When I was a teenager I went to a local Renaissance Festival and fell in love with head jewelry I saw there. I wanted to make some ever since. Last year I finally found affordable supplies to make some to sell in my etsy shop. I've also grown interest the last few years in India and Pakistani traditional clothing, along with other cultures in the regions round about. So, here's a 'gypsy head jewelry' inspired by the coins and bells that you might see in current 'tribal' or 'gypsy' belt jewelry. I originally bought the 'coin' charms/tags to stamp letters and words on. I'm just a renaissance festival nerd. I love dressing up!
Saturday, February 23, 2013
Saturday, February 16, 2013
Tag Turtle Toy for Babies
 Here is a 'tag toy' I made for a cousin's baby out of my mother's scrap polyester knits, ribbon, and batting. It was way easy especially since I left the raw edge out. You can get away with that with double knit polyester! I also used a straight 'stretch' stitch to make sure the ribbons and head were secure. It's about 6 inches long tongue to tail.
Saturday, February 9, 2013
How to Make a Children's Elf Cape


This fits kids sizes 4-5.
I've been admiring the sweater elf dress/coats on Etsy. I don't know when I will be able to try to make one. I also have seen my daughter use an off-center skirt (longer on one side than the other) as a poncho on her shoulders. I thought about making an 'off-center' circle cape on purpose for my kids, and this is what became of it.
Here is a basic guide to make it:


The fabric I have used is about 54"wide lightweight knit. I folded the fabric so that there were 4 layers. After making the circle and cutting, I opened it an cut an 'off-center circle large enough for a neck and seam allowances.
Here is a trick for making a circle: Tie a sewing marker to the end of the cord. Measure the length of the skirt you need, allowing for waistbands, etc. from the point of the marker. Hold it at the central point (corner of double folded fabric) and carefully draw across the fabric keeping it tight and upright. It's a simple compass!

I used the extra better-looking scraps from around the circle as a hood. (I was looking a book once about medieval clothing construction one time and it suggested that the tailors used the leftovers from around the circle to make the dramatic long-pointed drop of the sleeves. Maybe they did this for their cool hood-capes.)

Make sure to sew large side to pointy side of the hood.

Fold the selvage front edge of the hood to the 'right' side, sew, and cover with lace.

Finished Hood. Yes, it looks a little tall, but that will make it look more romantic.

Cut a slit in the front to allow the head to come through along the grain of the fabric. Fold to right side and use a zigzag stitch to cover the raw edge, and to finish the middle of it. Cover with lace.

Use long stitch and make 2 rows of stitching along collar edge to gather. Gather it until it is the same length as the hood bottom. Pin with lots of pins.

HINT: Maybe everyone does this, but sew between the 2 rows of gather-stitching; it prevents as many folds being sewn down. Top stitch or trim excess if you like.

Sew lace on bottom using a zigzag or creative wide stitch, covering raw edge under lace about midway. Superfast and easy!

Grab the little kid and have them model it!
Saturday, February 2, 2013
Sewing Small Circles on a Ladybug Pattern
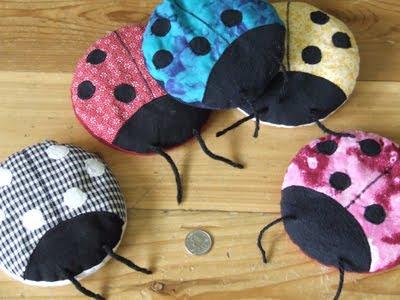
If you haven't seen these before, you can purchase an inexpensive pattern to make one yourself here. Here's a tip on how to sew those small little dots on with a satin stitch that actually looks good.

If you want to make one from my pattern you can find it here.
First off, pin the dots where you want them. My first thought is to use a baste stitch, or a long stitch (length 4), but it is actually less secure for when you use the satin stitching. Use a normal stitch length (2-3) and sew very close to the raw edge of the dot- See Below Picture. (If you want extra secure dots, use 'wonder-under' or other double sided fusible interfacing.)

Use the side wheel to hand 'crank each stitch so that it doesn't veer off the curve, pivoting the fabric every 3 or so stitches.
For the Satin Stitching, use Zig Zag stitch with a length at about 0.5 or near 0. Keep your hand on the wheel to pivot it every 3 or so stitches so it has a uniform look to it- Otherwise it will look more like polygon. If you want it to look really good, patience is the key.
For the more confident seamstress, just slowly sew using both hands to constantly pivot to make the curve. I admit, I wasn't as patient as I could have been while making this ladybug. I think the next one is the one I will list in my etsy shop.

Subscribe to:
Comments (Atom)


