Showing posts with label tutorial. Show all posts

Saturday, April 13, 2013

Earth Day Activity for Kids- Recycle and Grow

Wow- the beans sprouted within 3 days!
For Activity Day Girls, we planted seeds in aluminum cans.  We also had a short lesson on Faith is like a Seed.  Here are the results, and my daughter's plant above (only a week later!)


MATERIALS:
Adults should do the holes
We used 16 oz. cans.  If they have a ridge on the bottom, you can use a bottle opener/can piercer to poke it.  If not, just use an ice pick and hammer.  I used the cheapest dirt at Walmart- less than $1 per small bag.  We used yogurt or sour cream lids as water dishes/catchers.  Water it a little everyday to keep the dirt moist until the seeds pop up.  My daughter and I kept ours inside by a sunny bathroom window that tends to be very warm (almost like a greenhouse).
After we planted the seeds
If you want to use the 'flags' here is the document:
Cut just below the upper word 'grow'.  It folds down over the popsicle stick and then tape/glue.

Happy Earth Day!


Saturday, February 9, 2013

How to Make a Children's Elf Cape


This fits kids sizes 4-5.
I've been admiring the sweater elf dress/coats on Etsy. I don't know when I will be able to try to make one. I also have seen my daughter use an off-center skirt (longer on one side than the other) as a poncho on her shoulders. I thought about making an 'off-center' circle cape on purpose for my kids, and this is what became of it.

Here is a basic guide to make it:

The fabric I have used is about 54"wide lightweight knit. I folded the fabric so that there were 4 layers. After making the circle and cutting, I opened it an cut an 'off-center circle large enough for a neck and seam allowances.

Here is a trick for making a circle: Tie a sewing marker to the end of the cord. Measure the length of the skirt you need, allowing for waistbands, etc. from the point of the marker. Hold it at the central point (corner of double folded fabric) and carefully draw across the fabric keeping it tight and upright. It's a simple compass!
I used the extra better-looking scraps from around the circle as a hood. (I was looking a book once about medieval clothing construction one time and it suggested that the tailors used the leftovers from around the circle to make the dramatic long-pointed drop of the sleeves. Maybe they did this for their cool hood-capes.)
Make sure to sew large side to pointy side of the hood.
Fold the selvage front edge of the hood to the 'right' side, sew, and cover with lace.
Finished Hood. Yes, it looks a little tall, but that will make it look more romantic.
Cut a slit in the front to allow the head to come through along the grain of the fabric. Fold to right side and use a zigzag stitch to cover the raw edge, and to finish the middle of it. Cover with lace.
Use long stitch and make 2 rows of stitching along collar edge to gather. Gather it until it is the same length as the hood bottom. Pin with lots of pins.
HINT: Maybe everyone does this, but sew between the 2 rows of gather-stitching; it prevents as many folds being sewn down. Top stitch or trim excess if you like.
Sew lace on bottom using a zigzag or creative wide stitch, covering raw edge under lace about midway. Superfast and easy!
Grab the little kid and have them model it!

Saturday, November 24, 2012

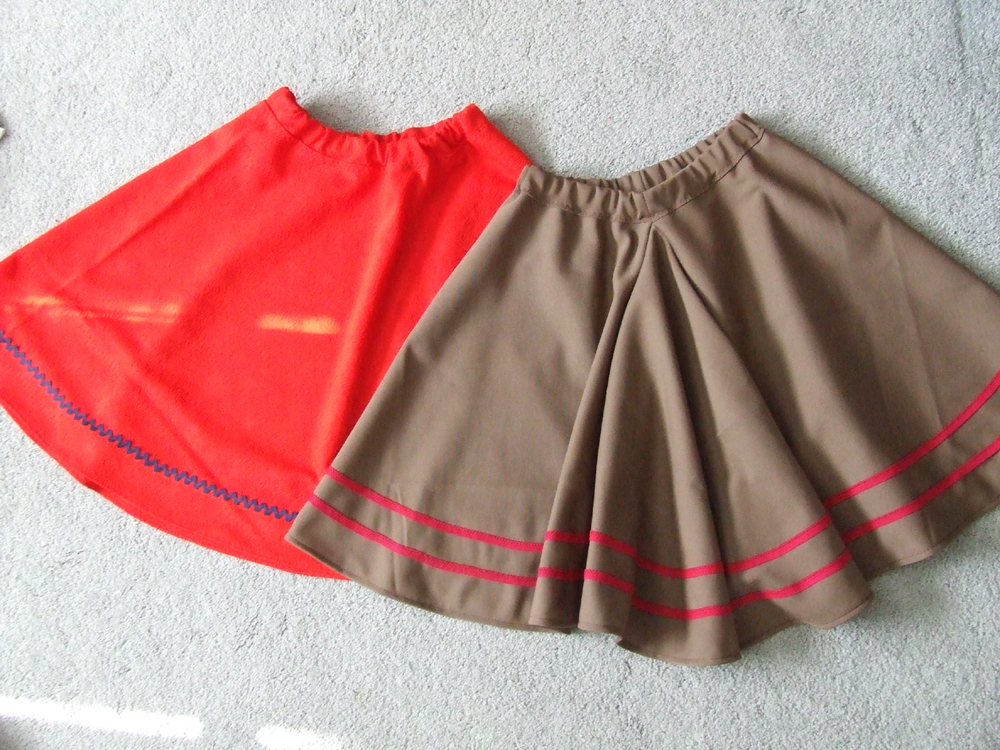
Simple Half Circle Skirt for Children


New Skirts
Simple Brown Skirt


A few months ago I did a tutorial on how to make a simple brown skirt.  I used the same method to make a couple more skirts for one of my daughters.  I did try something new- putting a 'bustle' type piece in the back.  I don't think I'll do it again with the same type of fabric, but it was a good learning experience.  Here are a few pictures of the process, but if you want more details on how to make it, please see my original tutorial on this blog here.


Brown skirt's method of measuring

Saturday, May 5, 2012

Cinco de Mayo Tissue Paper Flowers Tutorial

My mom lived in San Antonio when she was younger.  In school, they would make tissue paper flowers for the Mexican/Texas culture.  They would actually use a box of facial tissues.  You can use gift tissue and pipe cleaners.  They are very easy and inexpensive.  We used this craft for a non-messy and cheap and satisfying craft for Valentine's Day Party for my child's school class.


Cut the tissue sheets in 4 or 8 sections, depending on how large you want your flowers.
Stack at least 8 sheets of paper.  
Start on the short side and fold them back and forth like a paper fan.


Wrap a pipe cleaner around the center and twist tight like a bread bag twisty.
'Fan' out the paper and carefully pull each layer upwards close to the center pipe cleaner.


Make sure you do the layer on both sides before doing the next layer.


Do this all the way until the last layer, being careful not to rip them.


You can make all sorts of beautiful color combinations.  Have fun!

  oneprettything